The first thing I do is pick out the pictures I'm going to use. I go through my folders to pick them out. I'm getting pictures from my April 3rd folder.

I have chosen to use 3323 and 3324, placing an @ sign at the end of the name so I will know that I have used them.

Since I am using two photos, I will look for a 2 photo template that will go with my theme and photos. And it looks like Carena's Seahorse template will fit the bill perfectly.

Then it is on to chosing a kit or kits to use. I have been doing several pages of a family outing so I will be using that one again.

Now I figure out what size I need to make the pictures to fit within the template. The easiest way to get the size is to left click on the photo layer, hold and drag to the desktop.

Once I have the photo layer on the desktop I can go to Image>Image Information (shift i)

Click on the image information tab and get the size from the Dimensions box.

Now it is time to start working on the photos.
And, wow, what a dark photo. But the first thing I'm going to do is resize it, making the shortest side the 2.720". Don't forget to change the resolution to 300 dpi. Make sure the template is set at the same dpi.

Then I will use levels to lighten it enough to be able to use. Adjust>Brightness and Contrast>Levels...

If you have used the levels before you will need to click on the reset button first.
The black slider controls the shadows; the white controls the highlights and the grey controls the midtones. In this case, everything is pushed up against the shadows side so I moved the highlight slider over to just the beginning of the histogram.

If it is still too dark, I will move the highlight and midtone sliders until the picture emerges. (Note: if using an extremely dark photo you may find that when you start to light it that the photo will appear grainy. If this happens, I suggest you look for a better photo. I probably should have done so here)

I click on the photo layer and lower the opacity so that I will be able to see the photo below it (sometimes it helps to change the color). After lowering the opacity, I click on the level below which should be the photo. Using the pick tool (shift k), you can resize your photo to fit within the photo template. Just remember that it is better to downsize than to upsize.

Click on the template photo layer again and using the magic wand select it.

Up to Selections>Invert. Choose your photo layer, then hit the delete on the keyboard.

Chose the template photo layer again and then the delete button on the top of the layer palette and chose yes.

I'll do the same for any other photos I have before adding the papers and elements. Then I will chose the backgrounds and other areas where "paper" is needed. (i.e. the background and undersea hills). I normally add the drop shadow as I do each area so that I don't forget one. Now all I have to do is add the elements.

Lastly add journaling and I have a completed page.
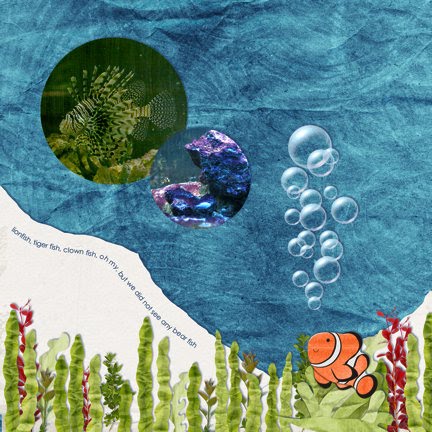
Template by Carena's Designs; "Squid Ink" (c)Creations by Rachel& Late Night Scraps; Font: Century Gothic
No comments:
Post a Comment
Note: Only a member of this blog may post a comment.